Passivhaus buildings have such low heat demand that they no longer need a conventional heating system. And some designers and clients, perhaps seduced by this fact, choose direct electric heating — panel heaters, radiant heating, electric underfloor heating, or heating coils in the MVHR supply air. It works, in the sense that the building stays warm, but I think it's a significant missed opportunity, and I think we should be more critical of it than we currently are.
Let's start with some numbers. A 2019 Passivhaus Trust report1; found that a building regulations compliant house has a design-stage heating demand of around 54 kWh/m²/year — but once the well-documented performance gap is factored in, actual demand rises to around 84 kWh/m²/year. A Passivhaus sits at 15 kWh/m²/year, with no performance gap to speak of: actual performance matches the model. Building regulations have tightened since 2019, so the gap between the two standards is somewhat smaller now — but it remains substantial.
Now consider the heating system. Direct electric heating has a coefficient of performance of 1: one unit of electricity in, one unit of heat out. Take a 100m² Passivhaus with a direct electric system: 1,500 kWh of heat demand per year, 1,500 kWh of electricity consumed, roughly £440 at current rates. That sounds excellent — until you compare it with what a well-installed heat pump achieves in a building regulations house. The best installers are routinely achieving SCOPs above 4 (the data on heatpumpmonitor.org makes for encouraging reading), which means that same 100m² building regulations house, despite its higher heat demand, ends up consuming around 2,100 kWh of electricity for space heating — costing something in the region of £600 per year. The Passivhaus with direct electric heating is cheaper, but not radically so. You've done all that work on the fabric, and your heating bills are only modestly lower than a building-regs house with a decent heat pump. Most of the (very good) arguments we make for Passivhaus in terms of reducing the strain on the grid and enabling faster decarbonisation fall apart if we choose direct electric heating.
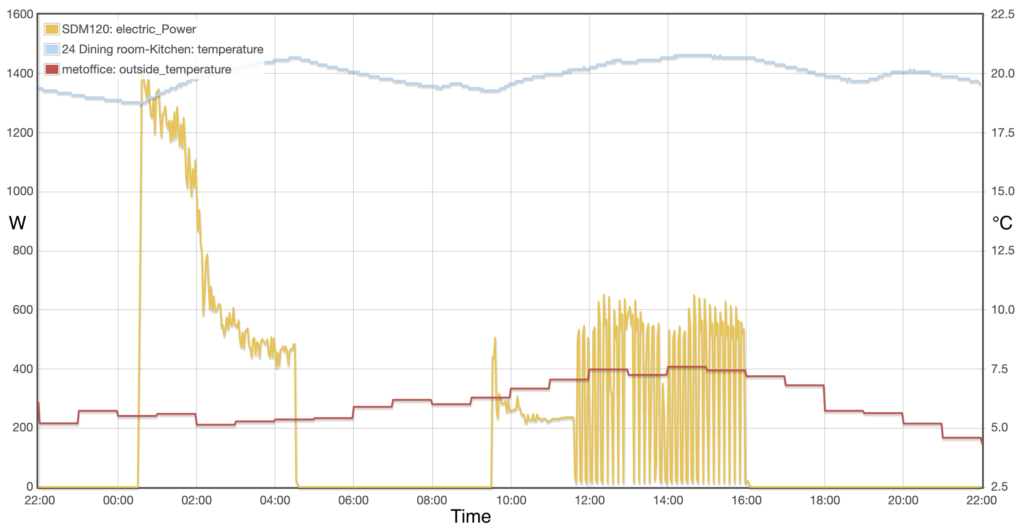
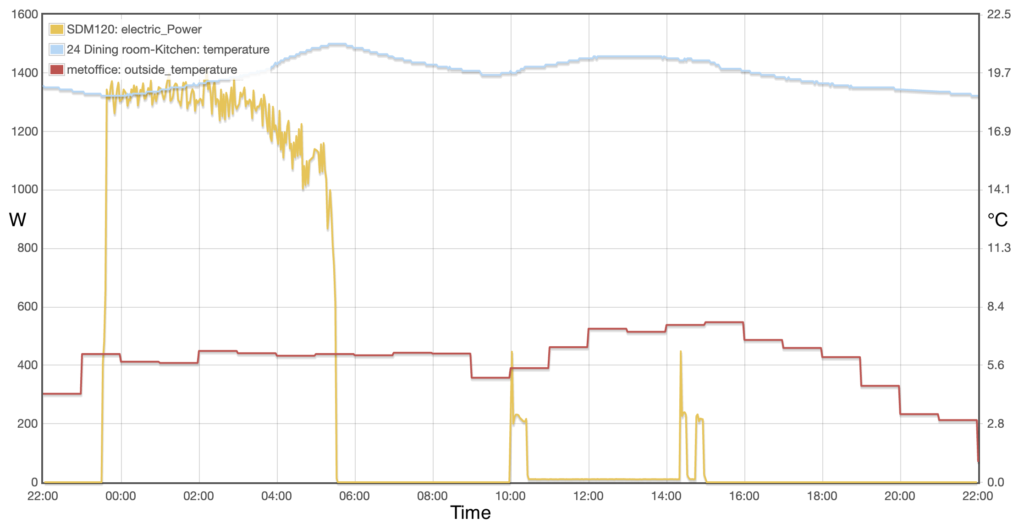
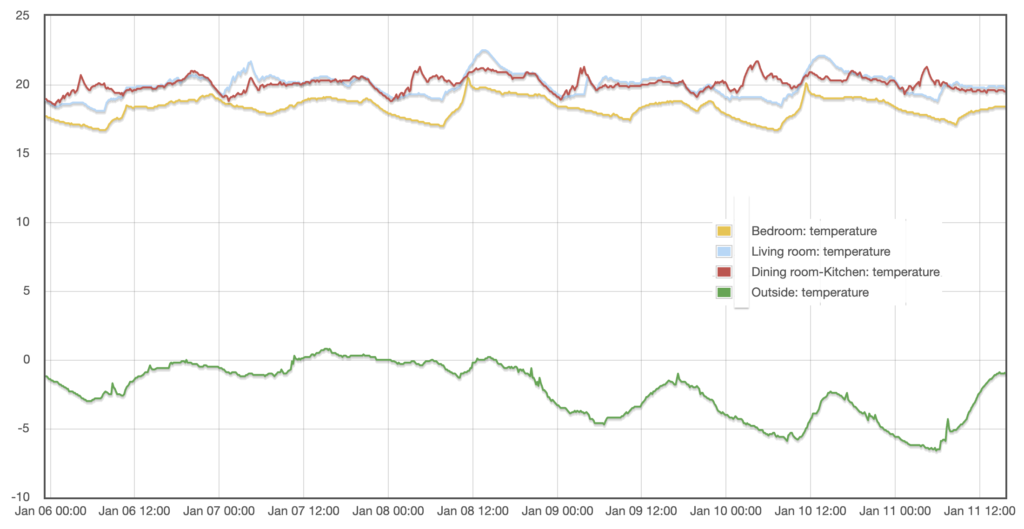
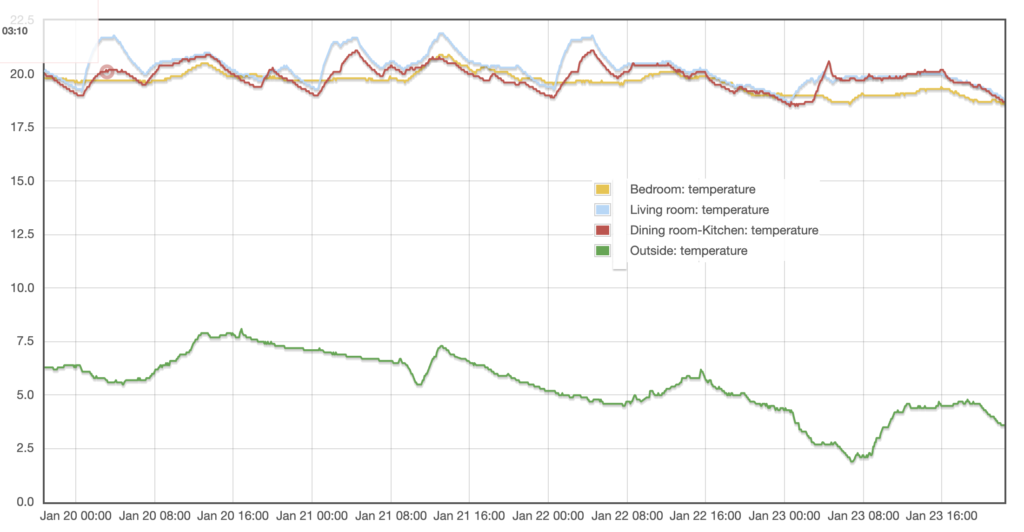
A Passivhaus with a well-chosen heat pump tells a very different story. In our own EnerPHit retrofit I estimate we're achieving a SCOP of between 4 and 5. On those numbers, the same 100m² Passivhaus needs around 380 kWh of electricity for space heating — roughly £110 per year, a quarter of what the direct electric Passivhaus uses.
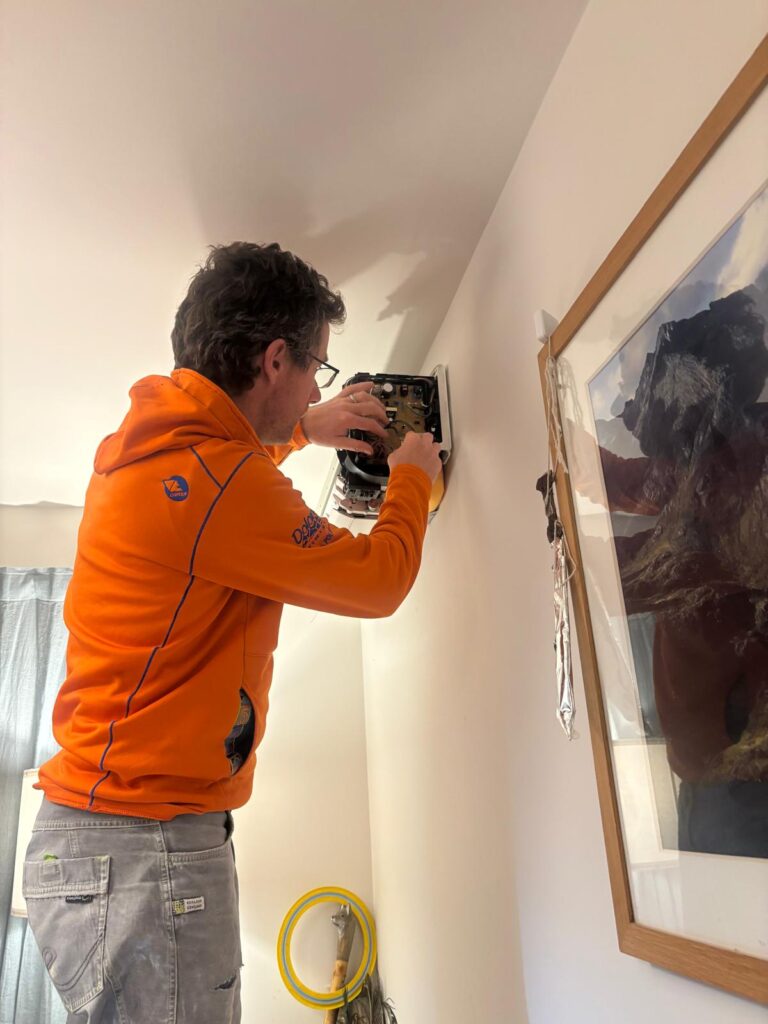
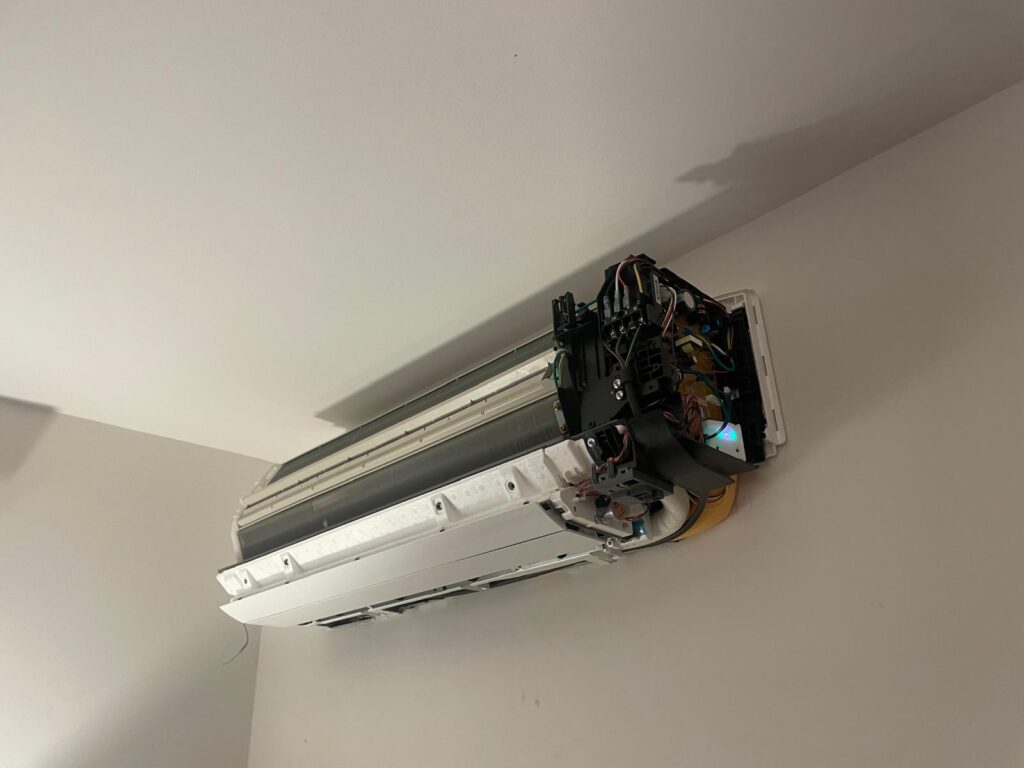
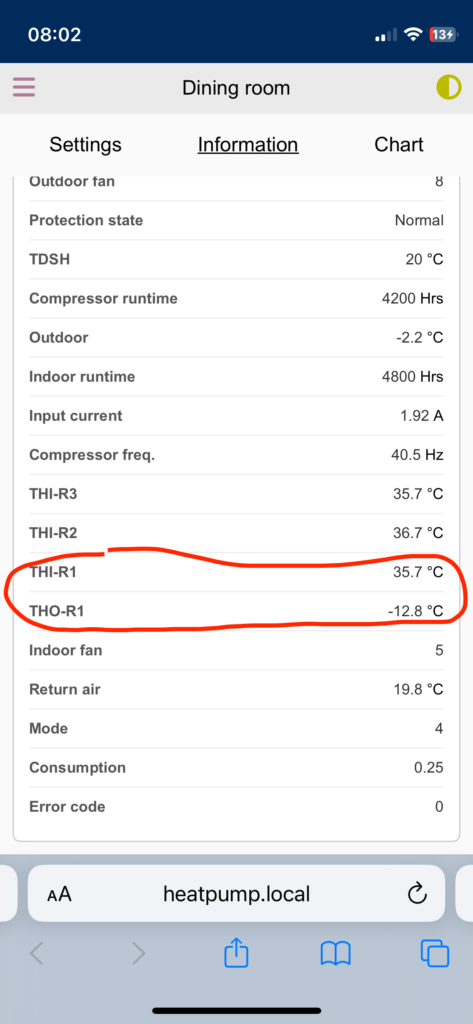
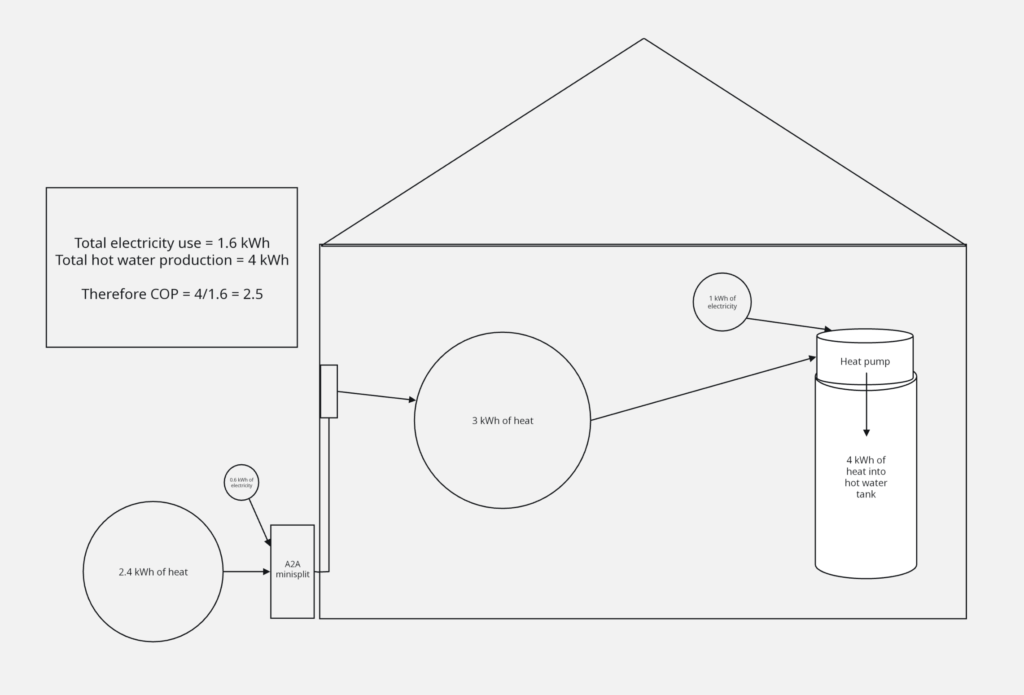
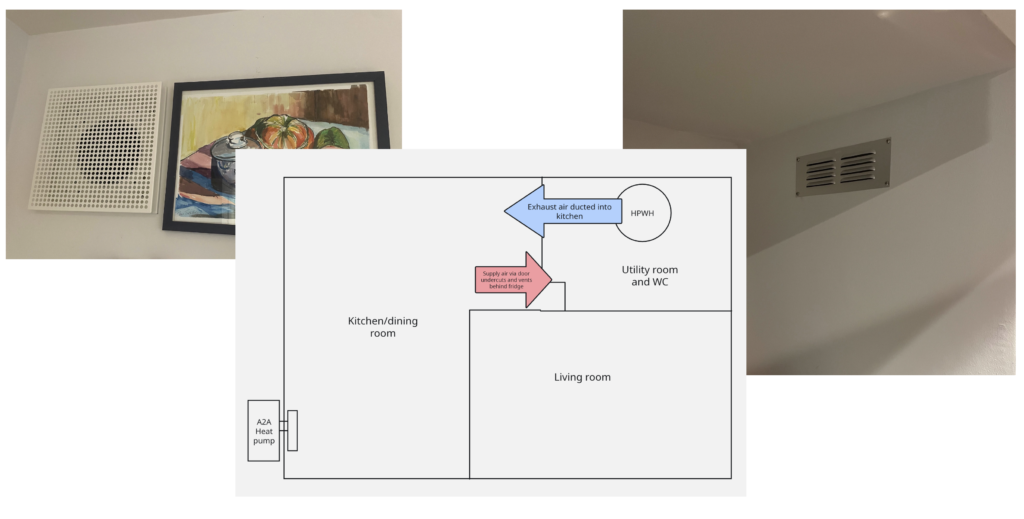
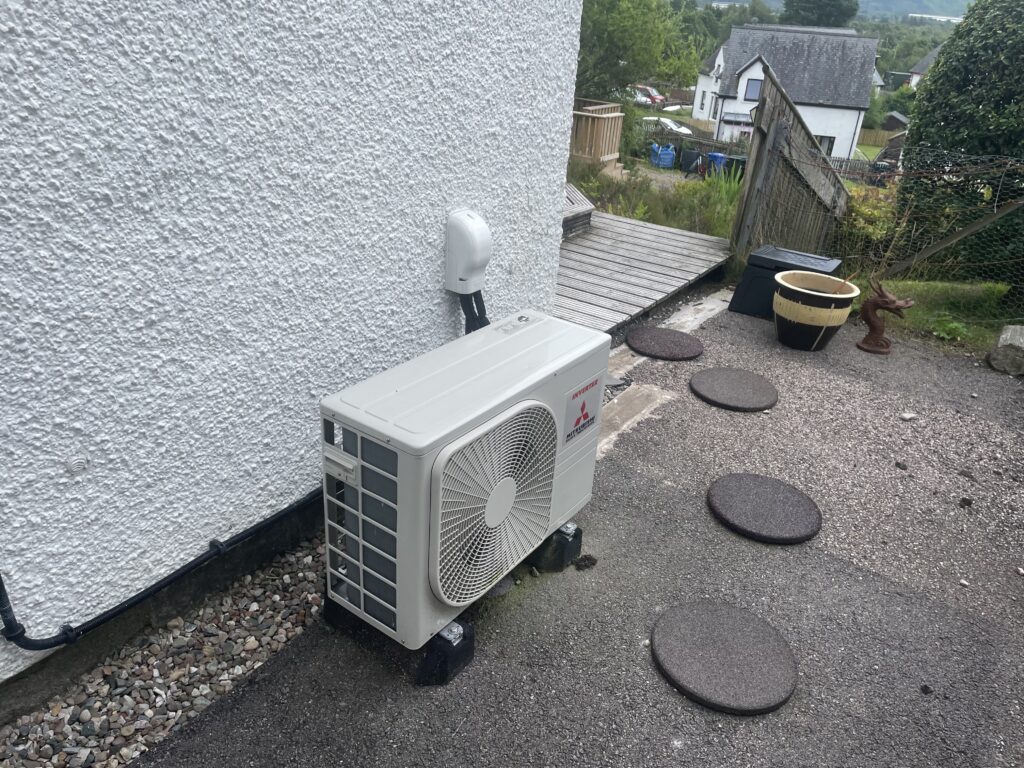
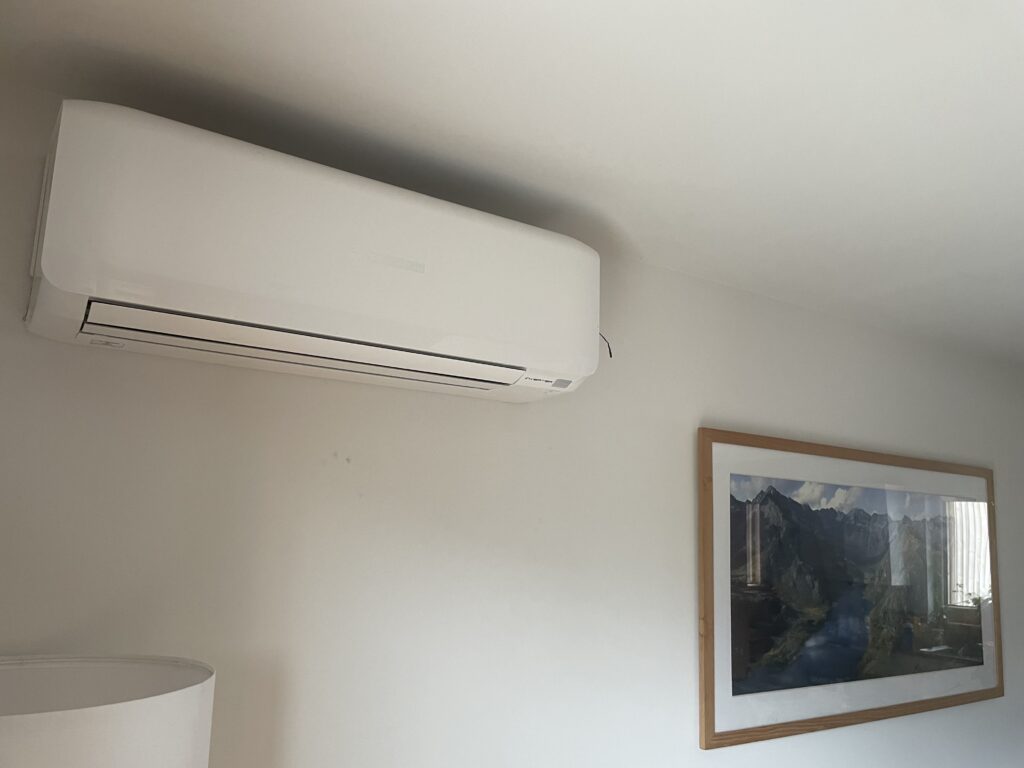
I understand why designers reach for direct electric. The obvious alternative in the UK — an air-to-water heat pump — costs somewhere between £7,000 and £13,500 installed before government incentives. That's expensive enough to get us wondering about alternatives. But an air-to-air minisplit sidesteps this problem almost entirely. A single unit adequate for a Passivhaus can be supplied and installed for £1,500 to £2,000. It is not a complicated system. The low heat demand means it will rarely work hard and heat distribution through open internal doors works well. I've written in more detail about the pros and cons of air-to-air minisplits in low-energy homes2 — and my experience has been broadly positive, with some caveats worth understanding before specifying one. A similar argument applies to hot water: I would advocate using a heat pump water heater alongside a minisplit rather than direct electric immersion, and I've written about that choice too3.

The counterargument is reliability: no refrigerant circuit, no outdoor unit, nothing mechanical to fail. These are real considerations and I don't dismiss them. But a minisplit in a Passivhaus is about as lightly loaded as a heat pump can be — and that should mean a long and trouble-free service life.
Passivhaus buildings should be the strongest possible argument for what the combination of excellent fabric performance and efficient heating systems can achieve. Specifying direct electric heating lets the fabric do all the heavy lifting, and then wastes most of the benefit at the final step.
PS. To be clear this critique is specifically about energy use and running costs. A Passivhaus with direct electric heating still delivers everything else the standard promises — exceptional comfort, stable temperatures, excellent indoor air quality through the MVHR system, and a building envelope built to last. The missed opportunity is a financial and carbon one, not a comfort one.
PPS. I should acknowledge that I'm probably being generous to the building regs house here, to make a point. Anecdotal reports from new build owners in the Highlands suggest annual heating bills closer to £2,000, albeit typically for houses larger than 100m² and with heat pumps that are almost certainly not achieving an SCOP of 4. My hunch is that the Highlands' exposure to wind means the performance gap is considerably larger here than the UK average — draughts that a building regulations house can't keep out make a very significant difference to actual heat demand in an exposed Highland setting. So the real-world gap between a building regulations house and a Passivhaus with direct electric heating is likely much larger than my numbers suggest.
Footnotes
1. Passivhaus Trust (2019). Passivhaus and Zero Carbon. Available at: https://passivhaus.uk/wp-content/uploads/2024/10/2019.03.20-Passivhaus-and-Zero-Carbon-Publication-Version1.21.pdf ↩
2. Tresidder, E. Air to air heat pumps for low-energy homes. Highland Passive. https://www.highlandpassive.com/a2a/ ↩
3. Tresidder, E. Heat pump water heaters – should you use indoor or outdoor air as the heat source? Highland Passive. https://www.highlandpassive.com/hpwh/ ↩